SEM
SEM 40177 2K Heavy Bodied Epoxy Seam Sealer GRAY 7 oz Cartridge Automotive
SEM 40177 2K Heavy Bodied Epoxy Seam Sealer GRAY 7 oz Cartridge Automotive
Couldn't load pickup availability
Brand: SEM
Warranty: No Warranty
Unit Type: oz
Manufacturer Part Number: 40177
Unit Quantity: 1
California Prop 65 Warning: WARNING: Cancer and Reproductive Harm. www.P65Warnings.ca.gov.
Country of Origin: United States
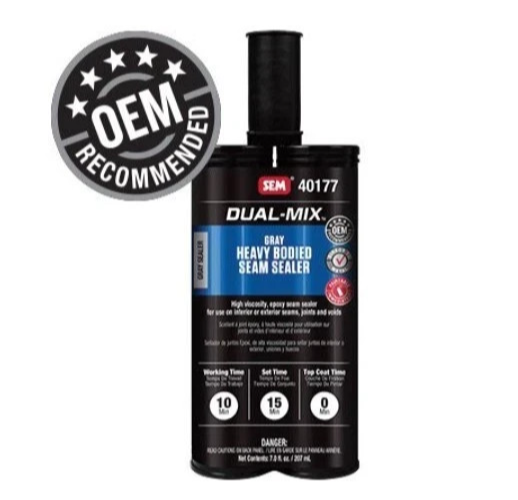
SEM 40177 Dual-Mix Heavy Bodied Gray Seam Sealer - 7 oz Cartridge - OEM Recommended for Auto Body Repairs!
Brand New, Genuine SEM Product! Perfect for DIY Enthusiasts and Professionals Alike!
Are you tackling an auto restoration project, repairing seams on your vehicle, or sealing joints to prevent leaks and corrosion? Look no further than the SEM 40177 Dual-Mix Heavy Bodied Seam Sealer in Gray! This high-viscosity, two-component epoxy is designed for sealing interior or exterior seams, joints, and voids on cars, trucks, and more. It's OEM recommended, ensuring factory-like results that hold up over time.
Key Features:
-
High Viscosity & Non-Sag Formula: Applies smoothly and holds tooling marks without dripping or sagging – ideal for vertical or overhead applications.
-
Fast Curing: Sets in just 15 minutes at 70°F, with full cure in 1 hour, so you can move on to painting quickly.
-
Paintable Immediately: Compatible with most solvent-based coatings right away (wait 15 minutes for waterborne). No scuffing needed if painted within 24 hours!
-
Flexible & Durable: Remains flexible without shrinking, cracking, or peeling, providing long-lasting protection against moisture, dust, and noise.
-
Direct to Metal Application: Bonds excellently to bare metal, primed surfaces, or OEM finishes.
-
Versatile Use: Can be beaded or sprayed for various textures, including OEM ripple beads with compatible tips (sold separately).
-
Gray Color: Matches many factory sealers, reducing the need for touch-ups and minimizing post-repair visibility.
-
Dual-Mix Forever Warranty: Backed by SEM's lifetime warranty for peace of mind.
-
Size: 7 oz (210 mL) cartridge – enough for multiple small to medium jobs.
This sealer is sprayable for added versatility and works great with SEM's Quick Spray System or specialized nozzles like ORBiT™ for replicating factory beads. It's VOC compliant in most areas (check local regs) and has a 2-year shelf life when stored properly.
Whether you're a weekend warrior fixing rust spots or a pro shop handling collision repairs, SEM 40177 delivers professional-grade results without the hassle.
Easy-to-Follow Instructions:
Follow these simple steps for a flawless application. Always work in a well-ventilated area at around 70°F for best results. You'll need: SEM applicator gun (manual or pneumatic), static mixer tip (like SEM 70011), gloves, sandpaper (P80/P400 grit), SEM Solve or universal cleaner, and optional tools like a putty knife or spreader.
Preparation (10-15 minutes):
- Warm your vehicle or work area to 70°F for at least an hour.
- Clean the seams/joints thoroughly with SEM Solve or a universal surface cleaner to remove dirt, oil, and old sealer.
- Sand bare metal with P80 grit or primed/OEM surfaces with P400 grit (or a gray scuff pad).
- Blow off dust and re-clean with the surface cleaner.
- Wipe with a tack cloth to remove any lint.
Note: For flexible areas (e.g., roof skins), apply a two-component primer first and let it cure fully. Avoid acid-etch primers to prevent issues.
Mixing (2-3 minutes):
- Insert the cartridge into your applicator gun.
- Pry off the cap with a screwdriver.
- Squeeze out a small amount until both components flow equally (equalize).
- Attach the static mixer tip and cut the end to your desired bead size.
- Hold the gun upright and dispense until product fills the mixer.
- Test a small bead on scrap material to ensure even mixing.
Application - Beading Method (5-10 minutes):
- Apply the sealer directly into the seam or joint.
- Tool it smooth with a gloved finger, putty knife, or brush for the desired shape.
- Wipe away excess while wet using a VOC-compliant solvent.
- For OEM looks, use optional tips like ORBiT™ over a thin wet bed of sealer.
Alternative - Spraying Method:
Use with a pneumatic applicator and Quick Spray System for textured finishes mimicking factory seals.
Finishing:
- Paint immediately with solvent-based paints or after 15 minutes with waterborne.
- Clean tools with solvent before the sealer cures.
Cleanup & Storage:
- Replace the cap by aligning shapes and snapping it on.
- Store in a cool, dry place away from heat/flames.
Follow these simple steps for a flawless application. Always work in a well-ventilated area at around 70°F for best results. You'll need: SEM applicator gun (manual or pneumatic), static mixer tip (like SEM 70011), gloves, sandpaper (P80/P400 grit), SEM Solve or universal cleaner, and optional tools like a putty knife or spreader.
Preparation (10-15 minutes):
- Warm your vehicle or work area to 70°F for at least an hour.
- Clean the seams/joints thoroughly with SEM Solve or a universal surface cleaner to remove dirt, oil, and old sealer.
- Sand bare metal with P80 grit or primed/OEM surfaces with P400 grit (or a gray scuff pad).
- Blow off dust and re-clean with the surface cleaner.
- Wipe with a tack cloth to remove any lint.
Note: For flexible areas (e.g., roof skins), apply a two-component primer first and let it cure fully. Avoid acid-etch primers to prevent issues.
Mixing (2-3 minutes):
- Insert the cartridge into your applicator gun.
- Pry off the cap with a screwdriver.
- Squeeze out a small amount until both components flow equally (equalize).
- Attach the static mixer tip and cut the end to your desired bead size.
- Hold the gun upright and dispense until product fills the mixer.
- Test a small bead on scrap material to ensure even mixing.
Application - Beading Method (5-10 minutes):
- Apply the sealer directly into the seam or joint.
- Tool it smooth with a gloved finger, putty knife, or brush for the desired shape.
- Wipe away excess while wet using a VOC-compliant solvent.
- For OEM looks, use optional tips like ORBiT™ over a thin wet bed of sealer.
Alternative - Spraying Method: Use with a pneumatic applicator and Quick Spray System for textured finishes mimicking factory seals.
Finishing:
- Paint immediately with solvent-based paints or after 15 minutes with waterborne.
- Clean tools with solvent before the sealer cures.
Cleanup & Storage:
- Replace the cap by aligning shapes and snapping it on.
- Store in a cool, dry place away from heat/flames.
Safety Precautions:
- Wear gloves, eye protection, and a respirator as per the SDS (available on SEM's site).
- Avoid skin contact; wash immediately if exposed.
- Use in well-ventilated areas to avoid inhaling fumes.
- Keep out of reach of children.
This is a must-have for any auto body toolkit! Ships fast and securely. Questions? Message me – happy to help!
Buy with confidence – 100% satisfaction guaranteed!
Share